
A Complete Step-by-Step Guide with Exact Prompts and Troubleshooting
If you tried creating an AI model in Leonardo or similar tools, you probably expected a clear “Train model” flow.
Higgsfield works completely differently — and this is where most tutorials fail.
There is:
- no “Train Model” button
- no LoRA, no weights, no checkpoints
- no negative prompt field
- no concept of “model export”
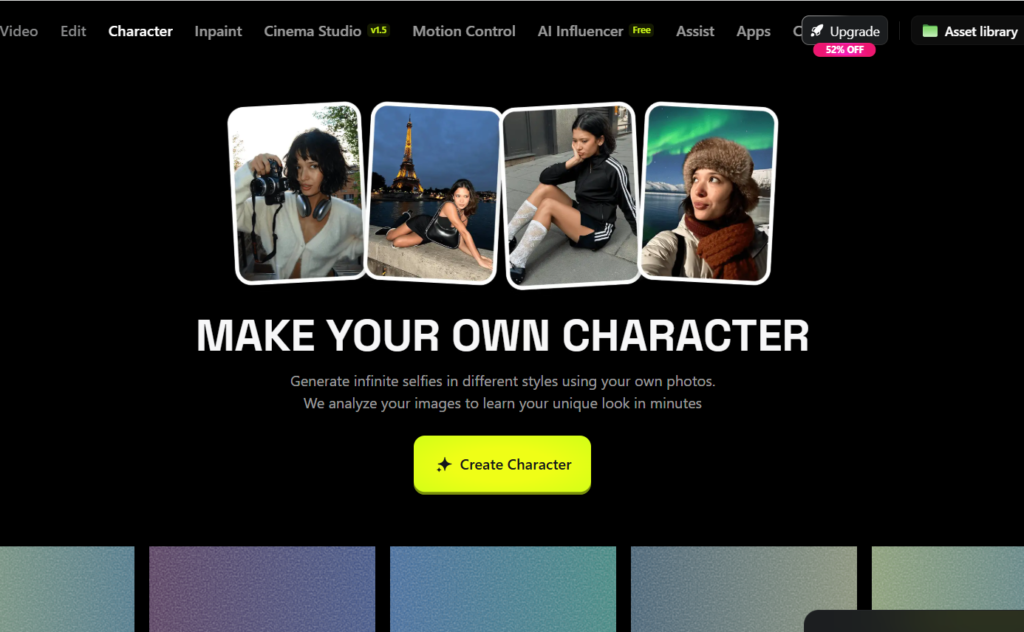
Instead, Higgsfield creates a Character purely from the images you upload.
If your images are wrong → the character will be wrong.
If your prompts are wrong → the character will drift.
If your styles are wrong → portraits will look worse than your source images.
This guide fixes those problems.
By the end, you will understand:
- how Higgsfield actually builds a character
- which prompts really work (and which break identity)
- why portraits often get worse after “training”
- how to test a character correctly
- how to prepare a portfolio and use the character for freelance work
How Higgsfield Actually Works
Higgsfield does not train a model.
It:
- analyzes uploaded images
- extracts a visual identity
- stores it as a Character profile
- reuses that identity during generation
There is no learning over time.
Every result depends on:
- image quality
- image balance (portrait vs body)
- lighting consistency
- style contamination
This means:
- bad dataset = permanently unstable character
- prompts alone cannot “fix” a broken dataset
Step 1. Account and plan (simple truth)
- Go to https://higgsfield.ai
- Create an account
- Choose any plan that allows:
- image generation
- character creation
- uploading 50+ images
There is no special training plan.
Step 2. Where images are generated (important UI clarification)
From the top menu:
- click Image
You will see:
- one single prompt field
- style / preset selection (Soul / Realistic / etc.)
⚠️ There is NO separate Negative Prompt field in Higgsfield.
If a tutorial mentions one — it is wrong.
Step 3. The Identity Anchor (what actually matters)
Higgsfield does not understand “same person” automatically.
Every prompt MUST repeat the identity anchor.
Identity Anchor (use exactly this structure)
same young woman, same facial identity, consistent face structure,
realistic skin texture, natural proportions, professional photography
This is not optional.
Without it, identity WILL drift.
Step 4. Generate the Dataset (the part that decides everything)
This is where most people fail — including you earlier — and it’s not your fault.
The problem was style contamination and lighting mismatch.
General rules (read carefully)
- Avoid cinematic, editorial, lifestyle-heavy prompts
- Avoid soft window light dominance
- Avoid strong shadows
- Avoid “instagram”, “fashion”, “artistic” keywords
- Neutral > pretty
You are building reference images, not content.
4.1 Anchor Portraits (MOST IMPORTANT – 16–20 images)
These are the images you showed later — yes, they are correct.
Use ONLY this prompt (repeat with minor angle changes):
same young woman, same facial identity, front facing portrait,
neutral expression, no smile,
even studio lighting, plain grey background,
realistic skin texture, professional photography,
no makeup, no dramatic light, no stylization
Variations allowed:
- slight head tilt
- 3/4 angle
- very subtle expression change
❗ Do NOT add:
- soft window light
- cinematic
- warm tones
- lifestyle
These images anchor the face.
4.2 Half-body images (12–16 images)
Purpose: teach torso proportions without breaking identity.
same young woman, same facial identity,
half body photo, standing straight,
arms relaxed,
even indoor lighting,
simple neutral interior,
realistic body proportions,
professional photography,
no dramatic shadows, no cinematic style
❗ Avoid:
- sitting
- walking
- lifestyle words
4.3 Full-body images (12–16 images)
Purpose: stop broken legs / wrong height.
same young woman, same facial identity,
full body photo, standing straight,
arms relaxed along body,
neutral posture,
plain minimal interior,
even daylight,
realistic body proportions,
professional photography,
no fashion editorial, no dramatic pose
4.4 Lifestyle images (MAX 8–10 images)
Lifestyle too early caused your portraits to degrade.
Use very limited lifestyle:
same young woman, same facial identity,
casual indoor lifestyle photo,
standing or sitting naturally,
soft daylight,
realistic photography,
no cinematic lighting, no glamour
Step 5. How “negative prompt” actually works in Higgsfield
There is no negative prompt field.
Everything you want to forbid must be written inline:
..., no cinematic lighting,
no glamour,
no beauty retouch,
no blur,
no stylization,
no exaggerated shadows
Do NOT:
- write a separate block
- use
--negative - use parentheses
Step 6. Cleaning the dataset (mandatory)
Before creating the Character:
Delete any image with:
- darker face than others
- strong shadows on one side
- glossy / plastic skin
- face that looks “prettier” but different
Quality > quantity.
Step 7. Create the Character (UI reality)
- Go to Character
- Click Create Character
- Upload all cleaned images at once
- Wait
There is:
- no training screen
- no progress bar
- no settings
Step 8. How to test the character
❌ WRONG testing (breaks identity):
- lifestyle prompts
- half body
- full body
- window light
✅ CORRECT test prompt:
same young woman, same facial identity,
neutral studio portrait,
front facing,
even studio lighting,
plain background,
realistic skin texture,
professional photography,
no cinematic style, no soft window light
If this fails → dataset issue, not prompt issue.
Step 9. Styles and presets
You cannot fully disable styles in Higgsfield.
Rules:
- Soul → best for identity checks
- Realistic → okay AFTER face is stable
- Presets always influence light
If identity breaks → go back to Soul + neutral prompts.
Step 11. Portfolio generation (safe workflow)
Generate:
- 3 anchor portraits
- 3 half-body
- 3 full-body
- 1–2 light lifestyle
Do NOT mix styles.
Formats:
- vertical 4:5 or 3:4
- no watermarks
- consistent lighting
Step 12. Freelance reality (what you actually sell)
You sell:
- images
- consistency
- character visuals
You do NOT sell:
- model files
- character access
- Higgsfield accounts
Correct wording:
Custom AI-generated fictional character visuals created using licensed AI tools.
Step 13. When to reuse dataset vs recreate
Use Reuse Dataset if:
- same face
- you’re fixing lighting / proportions
Recreate if:
- face identity is wrong
- early dataset was contaminated by style
What to Do If the Character Test Fails (Exact Recovery Workflow)
If your test images look worse than the original dataset (face changed, darker skin, wrong proportions), this is NOT a prompt issue.
This is a dataset balance issue, and Higgsfield fixes it only one way: by adjusting the dataset and recreating or reusing the character.
Below is the only working recovery path.
1. First: Identify the Failure Type
Run the neutral test prompt (no styles, no lifestyle):
same young woman, same facial identity,
neutral studio portrait,
front facing,
even studio lighting,
plain background,
realistic skin texture,
professional photography,
no cinematic style,
no soft window light
Now compare with your anchor portraits.
You will see one of these problems:
❌ Problem A: Face looks different (eyes / nose / lips drift)
Cause
- Not enough neutral anchor portraits
- Too many lifestyle / window-light images
Fix (exact actions)
- Go to Character
- Open your character
- Click Reuse Dataset
- Do NOT delete the character
- Add 12–16 new anchor portraits ONLY
(front / 3⁄4 / neutral light, grey background) - Do NOT add:
- lifestyle
- full-body
- window light
- Reprocess the character
👉 This reinforces facial identity without restarting.
❌ Problem B: Face is darker / heavy shadows / looks “worse” than dataset
Cause
- Style preset or Soul lighting overriding dataset
- Dataset dominated by soft window light
Fix (exact actions)
- Go to Character
- Click Reuse Dataset
- Add 8–10 portraits with even studio lighting
- Remove (or stop using) images with:
- strong side window light
- warm cinematic tone
- Recreate character
- Test again using only neutral prompt
⚠️ Do NOT test with lifestyle or half-body yet.
❌ Problem C: Body proportions wrong / height inconsistent
Cause
- Too few full-body images
- Full-body images added too early or with style
Fix (exact actions)
- Go to Image
- Generate 12–16 clean full-body images using ONLY:
same young woman, same facial identity,
full body photo,
standing straight,
arms relaxed,
neutral posture,
plain minimal interior,
even daylight,
realistic body proportions,
professional photography
- Go to Character
- Click Reuse Dataset
- Add ONLY these full-body images
- Reprocess character
❌ Problem D: Identity unstable only in half/full body, but portraits OK
Cause
- Body images overpowering face anchors
Fix (exact actions)
- Do NOT regenerate portraits
- Add 6–8 additional anchor portraits
- Reuse Dataset
- Reprocess
- Test portrait → then half-body → then full-body (in this order)
2. When You MUST Recreate the Character (Not Reuse)
You must click Create New Character if any of these are true:
- Face does not resemble original at all
- Early dataset included:
- cinematic editorial
- heavy beauty retouch
- strong artistic styles
- Identity changed after multiple reuse attempts
In this case:
- Delete the character
- Start again with:
- 20 anchor portraits
- 12 half-body
- 12 full-body
- No lifestyle until the end
This is rare, but sometimes unavoidable.
3. Correct Testing Order (Most People Test Wrong)
Correct Testing Order (with Exact Test Prompts)
Testing must follow this order strictly.
If Step 1 fails, stop immediately and fix the dataset.
When using Soul, always explicitly specify clothing, even for portrait tests. Otherwise, the system may generate nudity.
✅ Test 1 — Neutral Front Portrait (IDENTITY CHECK)
Purpose:
Verify that the face identity is stable and matches the dataset.
Prompt:
same young woman, same facial identity,
front-facing neutral portrait,
neutral expression,
wearing a simple plain t-shirt,
fully dressed,
upper torso visible,
even studio lighting,
plain light grey background,
realistic skin texture,
professional photography,
no cinematic lighting,
no stylization
Expected result:
- Same face every generation
- Clear eyes, nose, mouth shape
- No dramatic shadows
❌ If this fails → dataset problem, do not continue.
✅ Test 2 — 3/4 Angle Portrait (GEOMETRY CHECK)
Purpose:
Check facial geometry consistency from a different angle.
Prompt:
same young woman, same facial identity,
3/4 angle portrait,
neutral expression,
wearing simple casual clothing,
plain t-shirt,
fully dressed,
even studio lighting,
plain light grey background,
realistic skin texture,
professional photography,
no dramatic shadows,
no cinematic style
Expected result:
- Same facial structure as Test 1
- No “new face” appearing
❌ If identity changes → add more anchor portraits.
✅ Test 3 — Half-Body (FACE + TORSO CONSISTENCY)
Purpose:
Verify that face identity holds when the body is visible.
Prompt:
same young woman, same facial identity,
half body photo, waist up,
standing straight,
arms relaxed,
wearing simple casual clothing,
plain t-shirt,
even indoor lighting,
neutral background,
realistic proportions,
professional photography,
no lifestyle styling,
no cinematic lighting
Expected result:
- Same face as portrait tests
- Natural torso proportions
❌ If face changes here → dataset lacks half-body anchors.
✅ Test 4 — Full Body (PROPORTION CHECK)
Purpose:
Verify full-body proportions without breaking identity.
Prompt:
same young woman, same facial identity,
full body photo,
standing straight,
arms relaxed along the body,
wearing simple casual clothing,
plain t-shirt and jeans,
fully dressed,
neutral posture,
even daylight,
simple minimal interior,
realistic body proportions,
professional photography,
no fashion editorial,
no dramatic pose
Expected result:
- Same face as previous tests
- Correct height and limb proportions
❌ If identity breaks → add more clean full-body images and reuse dataset.
✅ Test 5 — Lifestyle (LAST STEP ONLY)
Purpose:
Confirm identity stability in a real-world context.
Prompt:
same young woman, same facial identity,
casual indoor lifestyle photo,
standing naturally in a modern apartment,
soft daylight,
relaxed posture,
realistic photography,
no cinematic lighting,
no glamour,
no exaggerated shadows
Expected result:
- Same recognizable face
- Minor variation allowed, identity preserved
⚠️ Lifestyle should NEVER be used for initial testing.
Testing Rule Summary
- Always test in this order
- Never skip steps
- Never start with lifestyle or full body
- If Test 1 fails → stop and fix dataset
- Prompts do NOT fix identity — images do
This testing sequence prevents 90% of identity drift issues in Higgsfield.
4. One Rule That Saves 80% of Models
If the character looks bad in portraits,
never try to fix it with prompts.
Higgsfield does not “learn from prompts”.
It only responds to image balance.
Summary: Recovery Cheat Sheet
| Problem | What to Click | What to Add |
|---|---|---|
| Face drift | Character → Reuse Dataset | 12–16 anchor portraits |
| Dark / heavy face | Reuse Dataset | Even studio light portraits |
| Bad body | Reuse Dataset | 12–16 clean full-body |
| Completely broken | Create New Character | Clean dataset only |
Final honest conclusion
Higgsfield can produce stable, realistic AI characters —
but only if you treat it like a visual identity system, not a generator.